
Photoreal mode
In short: on Pro or Studio, open the Scene tab and switch on Photoreal. The viewport sharpens into a realistic render with real reflections and soft, natural light, and every image you export is rendered the same way. Choose the Quality (more samples look smoother but take longer), and add Depth of field for a soft background blur. It all runs on your device.
Photoreal mode is marked Experimental: it works your graphics card hard, so the studio can feel slow on laptops, older computers and phones. If it lags, choose a lower Quality, or switch Photoreal off while you set up a shot and on again to render it.
Switch it on
- Import your models and choose a look as usual.
- Open the Scene tab. Photoreal is the first section.
- Switch on Photoreal.
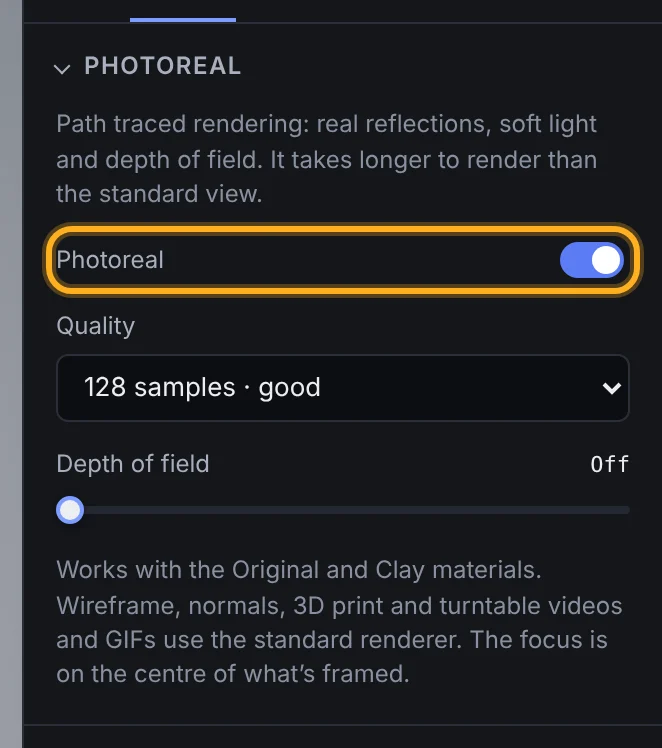 The Photoreal section
The viewport starts from a rough image and gets smoother as it refines. A label at the top of the viewport counts the samples, then says done. If you move the camera or change a setting, it starts refining again.
What photoreal changes
Photoreal mode traces how light really travels, so you get:
- real reflections: metals and glossy surfaces reflect the model's other parts and the studio light;
- soft, natural light: from the environment, as well as the key, fill and rim lights;
- depth of field, if you want it.
The background and the soft shadow on the ground stay exactly as you set them in the Scene tab.
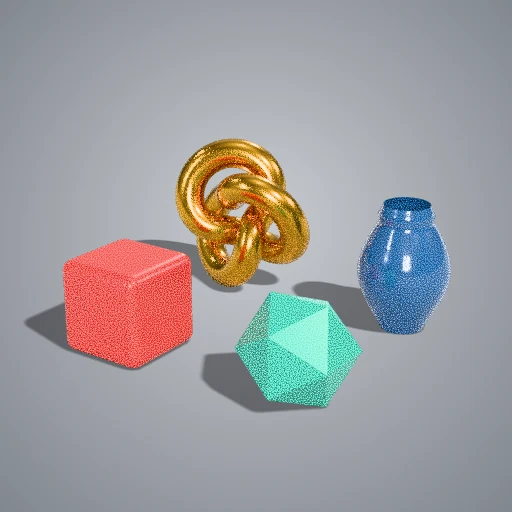 A photoreal export at draft quality (32 samples): higher quality settings are smoother
Quality
Quality sets how many samples each pixel gets: more samples mean less grain, but each image takes longer.
| Quality | Use it for |
|---|---|
| 32 samples · draft | Quick previews |
| 64 or 128 samples · good | Most listing images |
| 256 samples · high | Hero images and close-ups |
| 512 or 1,024 samples · best | Studio: the smoothest results, for large prints and very glossy models |
How long an image takes depends on your computer's graphics card, the image size and the model. Try a small export first.
Depth of field
Depth of field blurs what's nearer and further than the centre of the frame, like a camera with a wide aperture. Keep it off for product listings where everything should be sharp, and try 30–60% for close-ups and hero shots.
Exporting
With Photoreal on, every still image you export is rendered photoreal: thumbnails, individual thumbnails, contact sheets, listing kits, multi-angle batches, colour variants and recipes. The progress window shows how far each image has refined, and Cancel works as usual. Each image counts as one export, as always.
Turntable videos and GIFs always use the standard renderer: a photoreal turntable would take far too long.
Materials it works with
Photoreal works with the Original and Clay materials. Wireframe, Normals and 3D print use the standard renderer, because their lines and layer effects can't be path traced. You can leave Photoreal on: it comes back when you switch to Original or Clay.
If your device can't run it
Photoreal needs a reasonably recent graphics card and browser. If yours can't run it, Shot3D says so and switches Photoreal off, and the standard renderer works as before. On older laptops and phones it may work but slowly: choose a lower quality.
Plans
Photoreal is on the £1 trial and Pro (up to 256 samples) and Studio (up to 1,024 samples). Image sizes follow your plan as usual.
Frequently asked questions
Are my models uploaded to render them?
No. Photoreal renders on your own computer's graphics card, like the rest of Shot3D. Nothing is uploaded.
Why is my photoreal image grainy?
It hasn't had enough samples. Choose a higher Quality, or wait for the viewport label to say done before judging it.
Why don't I see Photoreal in wireframe?
Wireframe, Normals and 3D print use the standard renderer. Switch to Original or Clay to see the photoreal render.