
Getting started with Shot3D: a tour of the studio
In short: Shot3D is a 3D product studio that runs in your browser. The screen has four areas: the top bar (the Export menu and your account), the library on the left (your models and look presets), the viewport in the middle (your scene, with a camera toolbar) and the inspector on the right (Lighting, Scene, Camera and Export settings). Nothing to install, and your files never leave your device.
This first part of the user guide shows you around. Each area gets its own tutorial later, so you don't need to remember everything now.
Open the studio
Go to shot3d.co.uk/studio in a modern browser such as Chrome, Edge, Safari or Firefox, or click Open the studio on the Shot3D home page. The studio opens straight away. You don't need an account to try it.
When it first opens, the studio is empty and invites you to drop in your models:
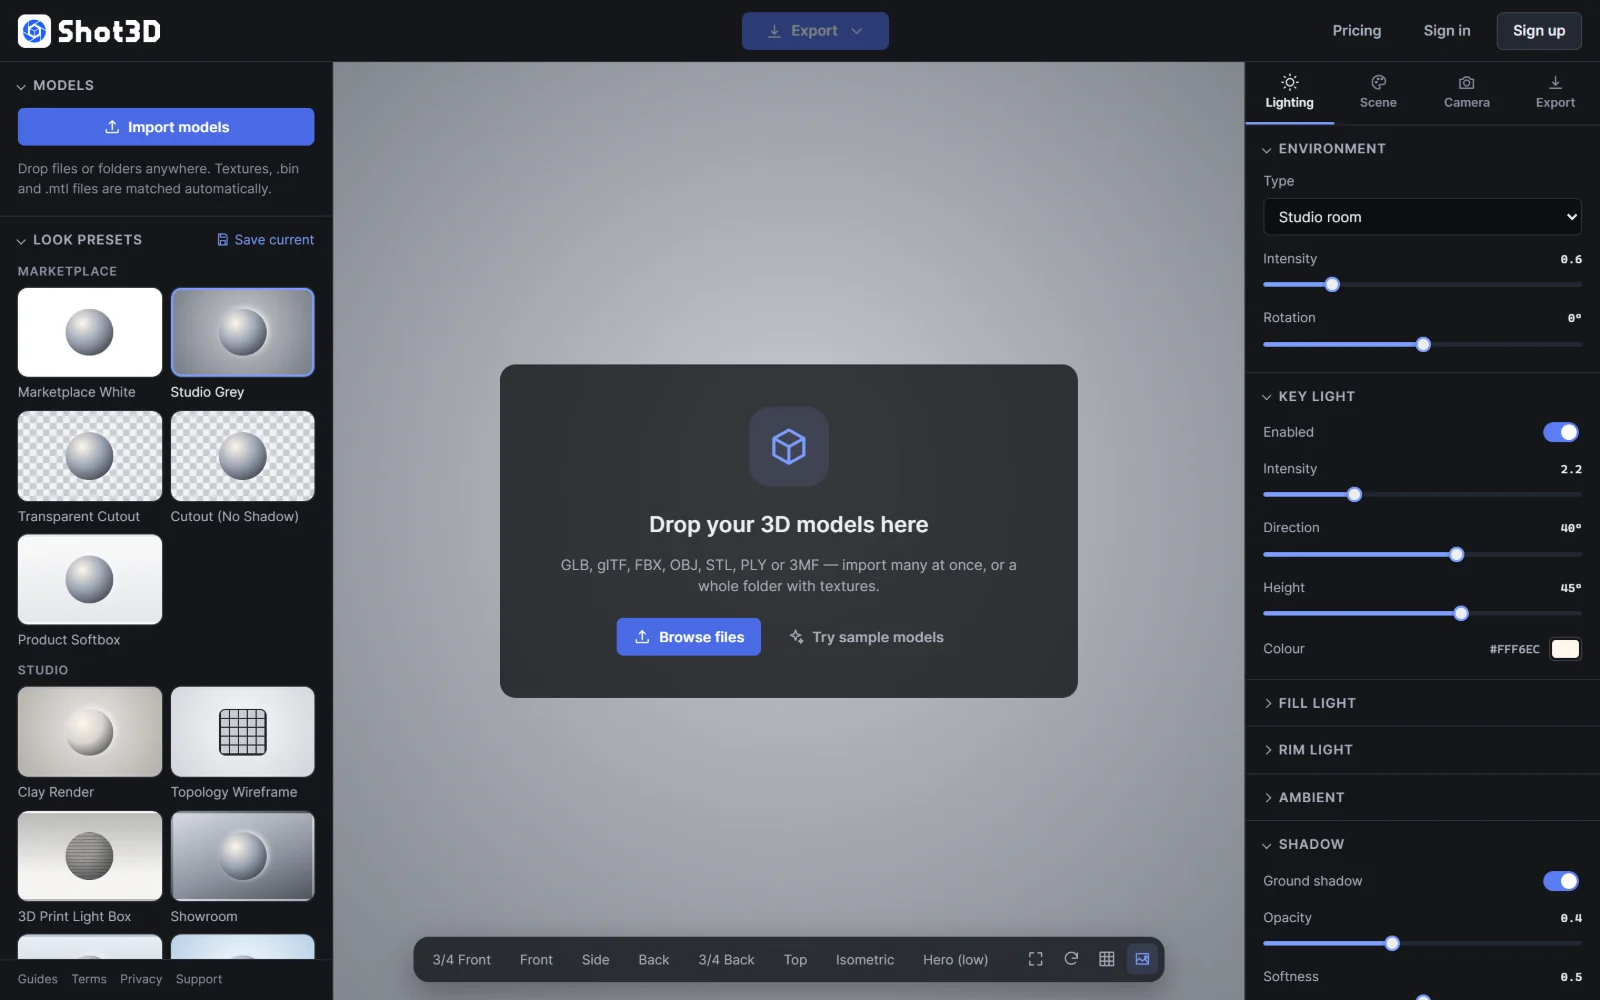 The studio when you first open it
Click Try sample models to load four demo objects (a gold knot, a ceramic vase, a toy block and a gem). They're a quick way to explore every feature before you use your own files.
The four areas of the studio
With models loaded, the studio looks like this:
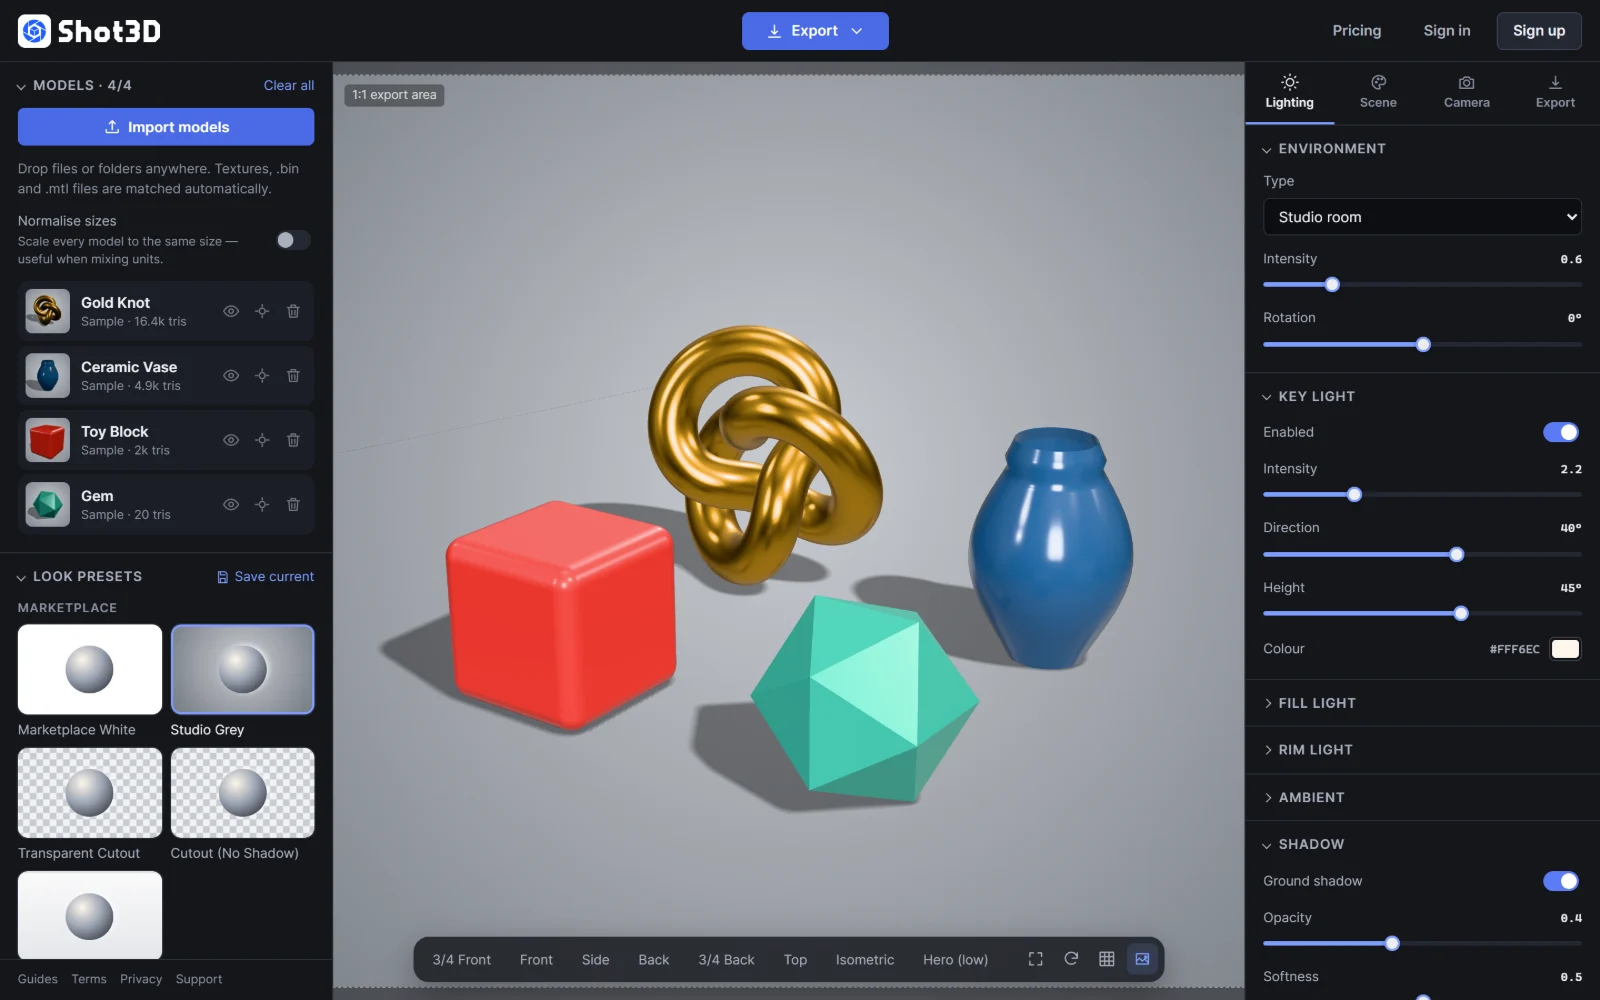 The studio with the sample models loaded
1. The top bar
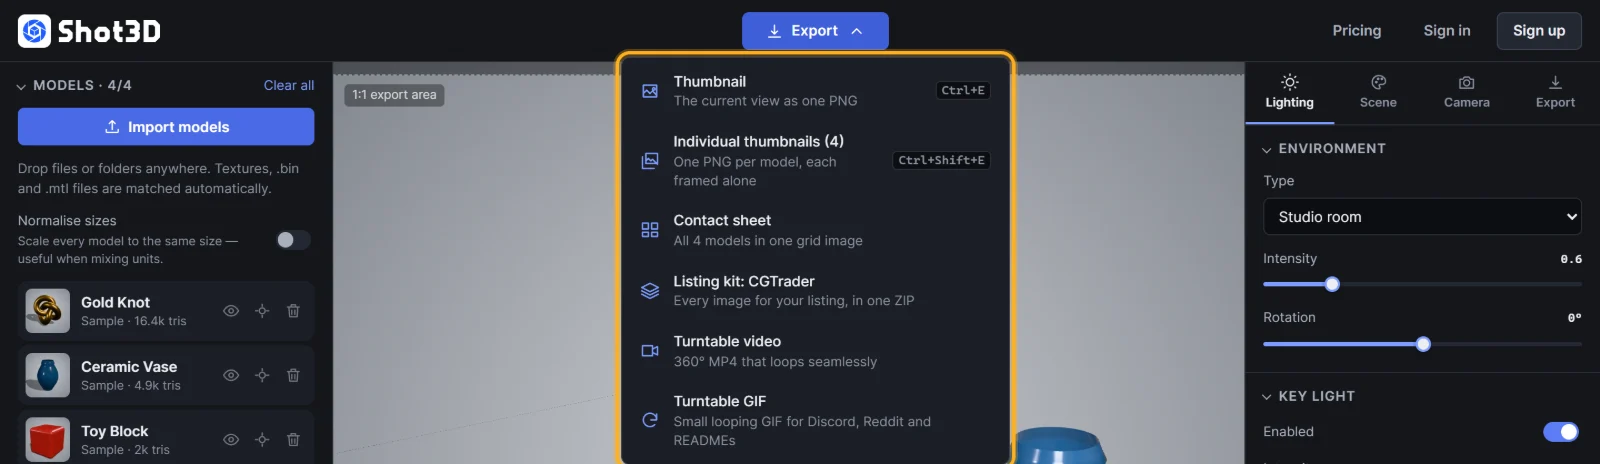 The Export menu in the top bar
The Export button in the middle is how you get images and video out of Shot3D. Click it to choose:
- Thumbnail saves the current view as one PNG.
- Individual thumbnails saves a separate, auto-framed PNG for every visible model. The number shows how many models will be exported.
- Contact sheet puts every visible model into one grid image, ideal for showing everything in a pack.
- Turntable video renders a 360° MP4, and Turntable GIF a small looping GIF.
On the right are Pricing, Sign in and Sign up. Once you're signed in, this shows your plan instead.
2. The library (left)
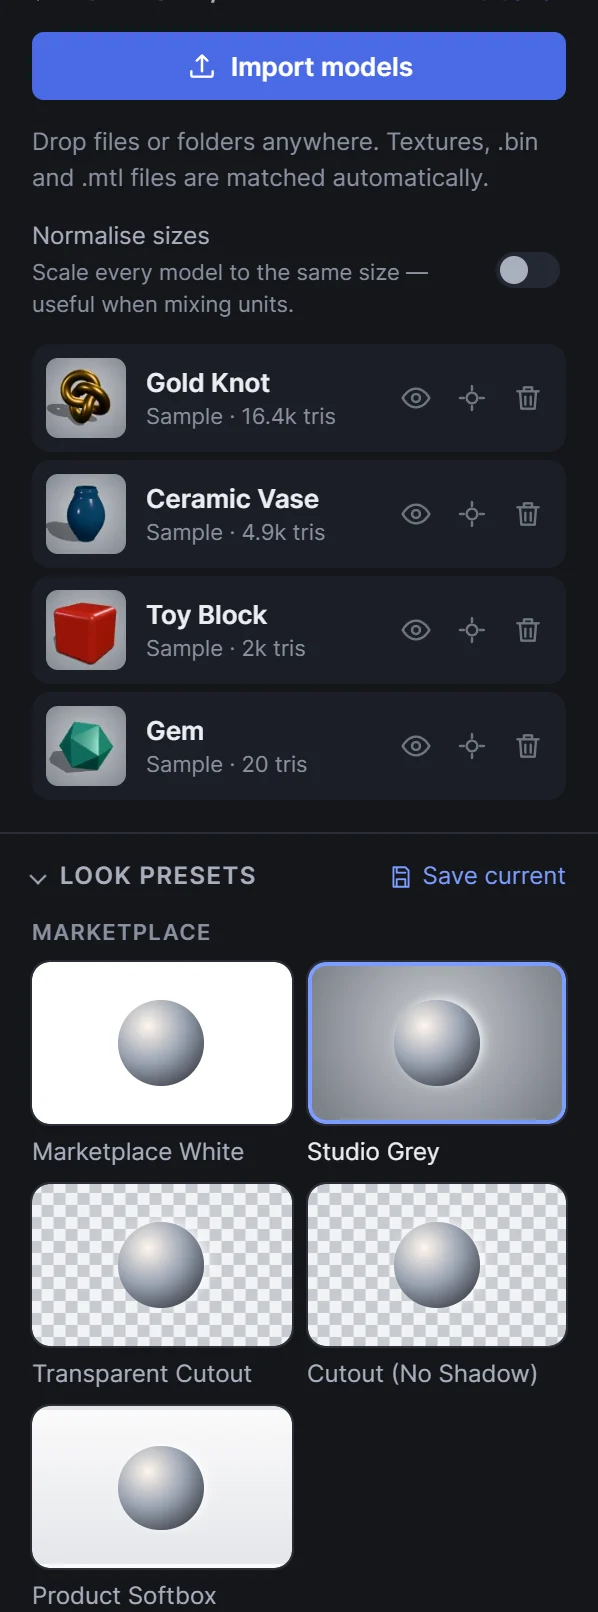 The library: models and look presets
The top of the library is the Models list: everything you've imported, with buttons to show, hide, focus and remove each model. Below it are the Look presets: one-click combinations of lighting, background and materials.
At the very bottom are links to these Guides, the Terms, the Privacy policy and Support.
3. The viewport (centre)
The viewport shows your scene in real time. Drag to orbit, right-drag or Shift-drag to pan, and scroll to zoom. The dashed outline marks the export area: exactly what will be captured when you export.
Along the bottom is the camera toolbar:
 The camera toolbar
It has one-click camera angles (3/4 Front, Front, Side, Back, 3/4 Back, Top, Isometric and Hero) and four toggles: Frame all, Auto-rotate preview, Show ground grid and Show export frame.
4. The inspector (right)
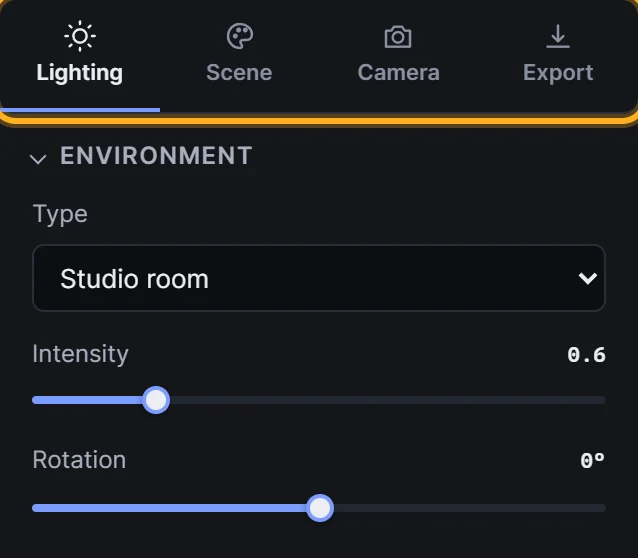 The inspector's four tabs
The inspector holds every setting, organised into four tabs:
| Tab | What it controls |
|---|---|
| Lighting | Environment light, key, fill and rim lights, ambient light, ground shadow, exposure and tone mapping |
| Scene | Background (solid, gradient, HDRI or transparent) and material overrides (clay, wireframe, normals) |
| Camera | Angles, lens, field of view, framing margin, auto-rotate and grid |
| Export | Aspect ratio, resolution, file names, batch delivery, contact sheet and turntable video settings |
Each tab is split into collapsible sections. Click a section's title to open or close it.
On a phone or small tablet
On narrow screens the studio rearranges itself so the 3D view stays at the top while you work. Everything from the library and the inspector moves into one tabbed panel underneath: Models, Presets, Lighting, Scene, Camera and Export. Swipe up and down inside the panel to scroll it. The Export button stretches across the top bar, with the same menu.
A typical workflow
Most sessions follow the same five steps, and each one has its own part in this guide:
- Import your models: drag files or a whole folder in.
- Pick a look preset: for example Marketplace White.
- Choose a camera angle: press 1 for the 3/4 front hero view.
- Set the export size: choose an aspect ratio and resolution.
- Export: one thumbnail, one per model, a contact sheet of them all or a turntable video.
Your settings are remembered in your browser, so the studio looks the same next time you open it.
Frequently asked questions
Do I need an account to use Shot3D?
No. You can use the studio straight away on the Free plan. An account is only needed to subscribe to Pro or Studio.
Are my models uploaded anywhere?
No. Models are opened and rendered in your browser, and exports are saved directly to your device.
Which browsers work?
Any modern browser with WebGL, such as current Chrome, Edge, Safari or Firefox, on Windows, macOS, Linux or ChromeOS. Turntable MP4 export works best in Chrome, Edge or Safari on desktop.